

Whilst it’s not exactly the most Instagram-worthy DIY task, caulking is extremely important if you’re looking to keep out draughts, water, or just add the finishing touches to a new paint job.
A decent bead of caulk can really make or break the finish of any DIY job, so learning how to do it yourself is a real lifesaver.
What Is Caulking?
Caulk, sometimes known as sealant, is a flexible filler that you apply to seal joints or gaps between two different surfaces. This line of caulk is what helps to keep out anything from moisture and dust to insects and cold air.
Of course, it isn’t just for practical purposes, caulk adds a nice, clean, finished look to any DIY project that really does look professional, even if you’ve done it yourself.
There are lots of different types of caulk depending on how you intend to use them. For example, bathrooms need something that handles more water than somewhere like an entryway or living space.
If you use the wrong caulk, you open yourself up to a whole world of problems like cracking, peeling, or it just not sticking at all. Let’s see how you can choose the right caulk for your job.
Which Caulk Should I Use?
Choosing the right caulk for your project really makes or breaks how long it lasts and how professional it ends up looking. We’ve put together the ultimate guide to caulk so you don’t need to worry.
|
Type of Caulk |
Best For |
Why It Works Well |
|
Acrylic Caulk |
Filling gaps around walls, ceilings, and skirting boards. |
It’s paintable, smoothable, and quick drying. |
|
Silicone Sealant |
Anywhere with water, e.g. kitchens and bathrooms. |
It’s waterproof, flexible, and mould-resistant, but not paintable. |
|
Decorators Caulk |
Filing in any cracks before painting. |
It’s flexible and paintable. |
|
Frame Sealant |
Around windows and doors. |
It’s weatherproof and paintable. |
|
Fire-Rated Caulk |
Any gaps in walls or ceilings for fireproofing. |
It slows the spread of fire and smoke. |
Things You’ll Need
● Caulk gun: For applying the caulk.
● Caulk of choice: Make sure you see the above table so you can choose the right one!
● Stanley knife: To cut the nozzle on the caulk.
● Masking tape: For super neat edges.
● Damp cloth or sponge: To smooth things over.
● Caulking tool: You can also use your finger.
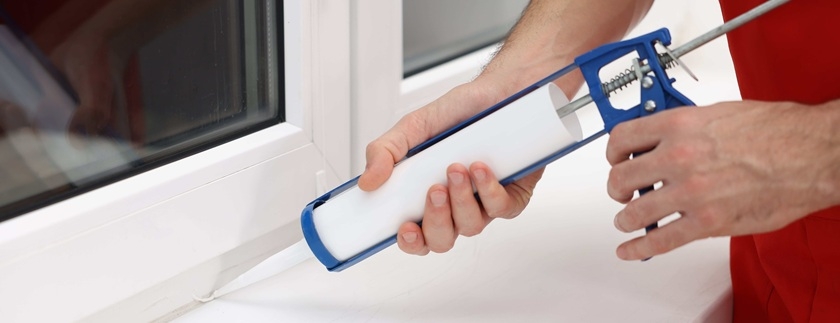
How to Caulk Like a Pro
Step 1: Prep the Surface
You want to start with a clean, dry, and dust-free working area. Make sure you remove any loose paint or old caulk before you start as well.
Step 2: Loading the Caulk Gun
It’s best to cut the nozzle of your caulk at a 45° angle so you can get a nice, precise finish. Try to cut closer to the tip for a thinner bead of caulk.
Insert the tube of caulk into the caulk gun and then squeeze a tiny bit out to check the flow. You can always cut further up the caulk if you need a thicker bead.
Step 3: Tape It Up
If it’s your first time caulking, then you might want to apply a little masking tape on either side of the gap you intend to fill. This isn’t a must, but it can help if you’re lacking confidence.
Step 4: Apply the Caulk
Make sure you hold the caulk gun at a 45° angle and gently squeeze whilst you move slowly along the gap you’re filling. Remember, you can always add more caulk, but it’s quite difficult to remove any excess should you add too much.
Step 5: Smooth It Out
Now you can use either a caulking tool or your finger to gently smooth out the bead so it’s nice and flat. Just be sure to work quickly, as caulk sets pretty fast.
Step 6: Wipe Off The Excess
Using a damp cloth or sponge, gently wipe up any excess caulk. If you have applied masking tape, remove it now before the caulk dries fully.
Step 7: Let It Dry
Drying times vary tremendously depending on the type and brand of caulk you are using. Be sure to check the manufacturer’s advice on the container and allow it to dry fully before you add anything like paint.